- Published on
How to Add an AI Chatbot to Wordpress - Step-by-Step Guide
- Authors

- Name
- Jai
- @jkntji
Adding an OpenAI chatbot to a WordPress site is easy and does not require extensive coding skills. With just a few simple steps, your WordPress site will have an AI chatbot. This guide shows you exactly how to add a chatbot to a WordPress site using Predictable Dialogs.
OpenAI Chatbot For WordPress
This will be a two-step process of generating the code and adding it on your WordPress site.
Generate embed code for WordPress
Go to create agents and click "Create Agent" [Needs login]
Give you chatbot agent a name, then click "Add AI" on the next page.
Add the Instructions for your chatbot and click Save. Your chatbot is ready to chat and you can test it on the playground.
Click Install on the left hand side menu. Click COPY on the Embed code. The copied code will be pasted into your wordpress site in the next steps.
Embed on Your Wordpress Website
You have two easy options:
Method 1: Wordpress Site Editor
- Go to Appearance → Editor → Pages.
- Choose "Add New Page", and title it (e.g., "OpenAI Chatbot").
- Select "Type / to choose a block", a "+" would show, click on it and select **Custom Html"
- Paste the chatbot code.
- Click Publish.
- Click on "View Page" Icon to interact with your new chatbot.
Similarly the custom HTML can be added to the templates and other places in Wordpress where html can be added.
Method 2: Use WPCode Plugin
WPCode plugin simplifies Wordpress OpenAI integration:
- Install the WPCode plugin (formerly "Insert Headers and Footers").
- Go to WPCode → Code Snippets → Add New.
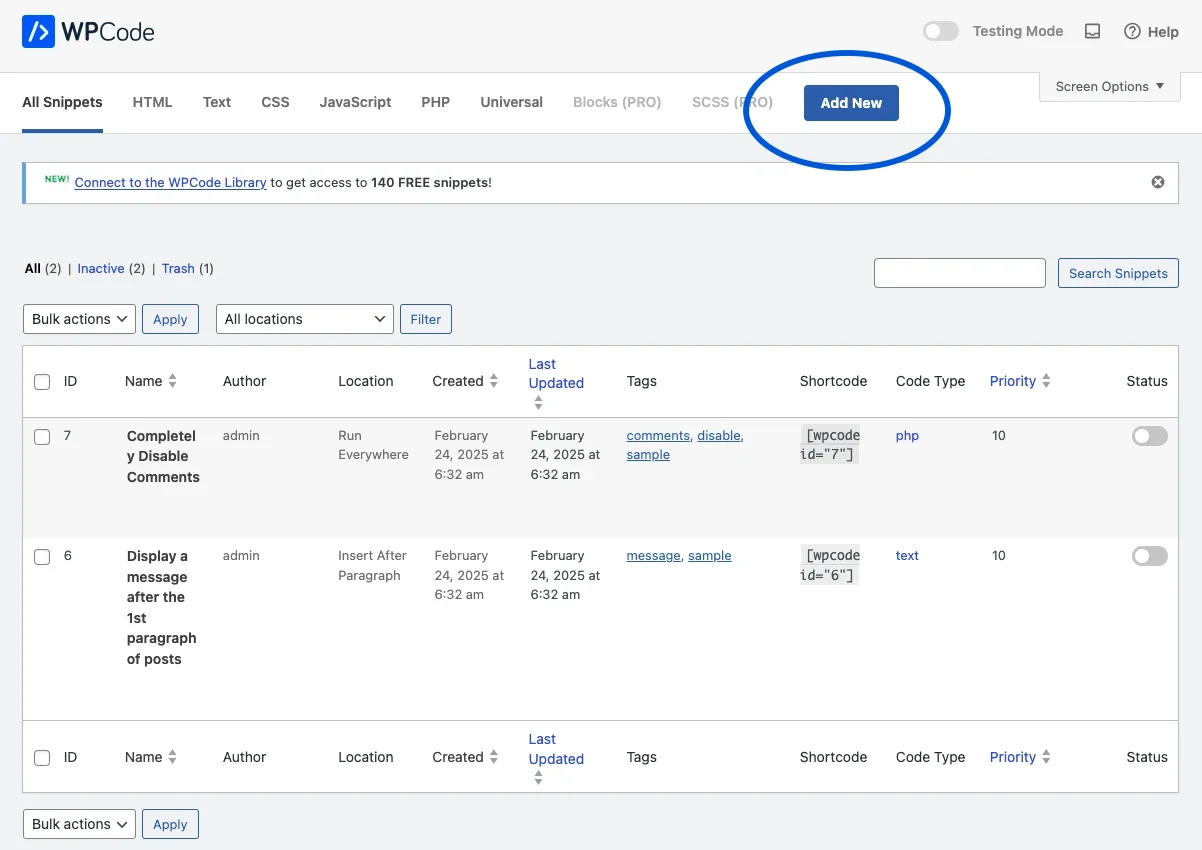
- Select "Add Your Custom Code (New Snippet) as shown in the image.

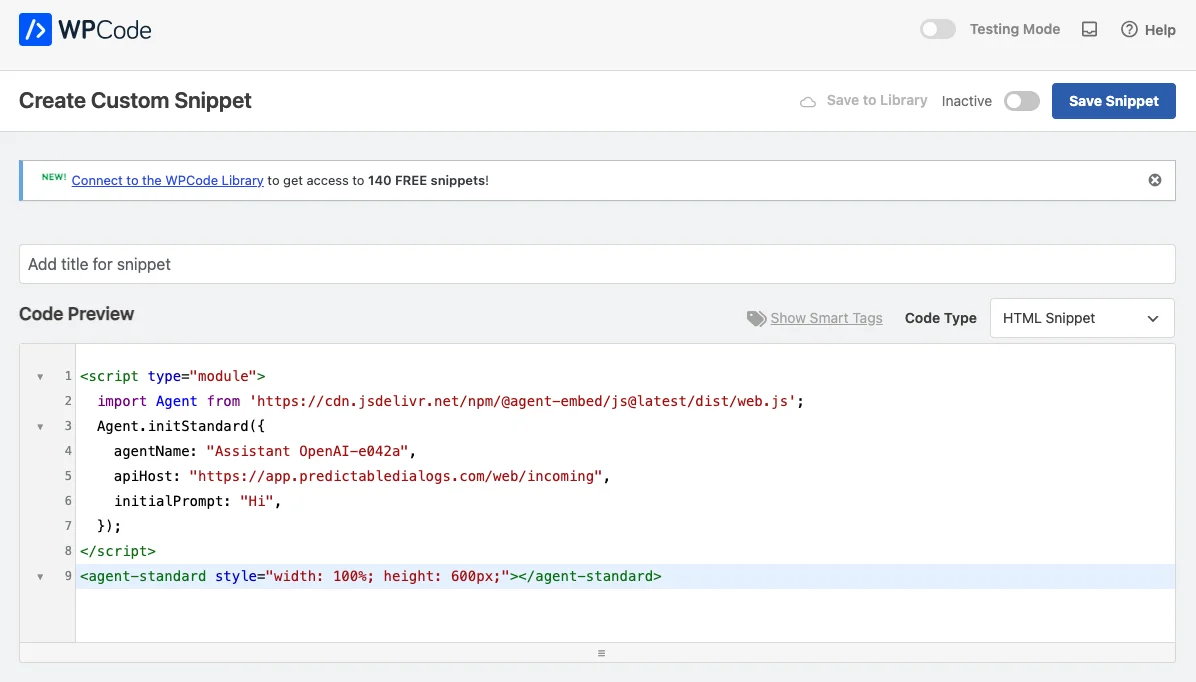
- Select "HTML Snippet" from the options as shown in the image.

Give it a title (e.g., "Wordpress open ai").
Paste the generated OpenAI Wordpress Script.
<script type="module">
  import Agent from 'https://cdn.jsdelivr.net/npm/@agent-embed/js@latest/dist/web.js'
  Agent.initStandard({
    agentName: 'Assistant OpenAI-e042a',
  })
</script>
<agent-standard style="width: 100%; height: 600px;"></agent-standard>
- Toggle "Activate" and click "Save Snippet".

- Visit your website—the Wordpress OpenAI chatbot is now live!

Now your Wordpress site has a fully integrated, AI chatbot, enhancing user experience and engagement.
Thanks for reading!
FAQ: Adding an OpenAI Chatbot to WordPress
How do I add a chatbot to my WordPress site?
You can easily add a chatbot to your WordPress site by generating embed code using Predictable Dialogs and inserting the provided HTML into your WordPress editor or by using the WPCode plugin.
Can I add an OpenAI chatbot to WordPress without coding?
Yes, you can integrate an OpenAI chatbot into your WordPress site without coding. Simply copy and paste the generated HTML code from the Predictable Dialogs app into your WordPress pages or use the WPCode plugin.
What plugin can I use to add custom chatbot code to WordPress?
The WPCode plugin (formerly Insert Headers and Footers) is recommended for easily adding custom HTML snippets, including chatbot code, to your WordPress site.
Is adding an OpenAI chatbot to WordPress free?
While WordPress integration itself is free, you will need an OpenAI API key, which typically involves costs based on your OpenAI usage. The WPCode plugin and Predictable Dialogs HTML embed methods mentioned are free.
Where do I place chatbot HTML code in WordPress?
You can place chatbot HTML code directly into pages using the WordPress Site Editor (Appearance → Editor → Pages) or insert it globally using the WPCode plugin under "Custom HTML Snippets."
Can I customize the chatbot's appearance on my WordPress website?
Yes, you can customize aspects like chatbot size and position by adjusting the provided HTML embed code or through settings in the Predictable Dialogs platform.
Why should I integrate an OpenAI chatbot into my WordPress site?
Integrating an OpenAI chatbot enhances user engagement by providing instant, automated responses to visitors, improving customer experience and website interaction.