Create a Meta app
Estimated Time: 3 minutes
- Go to https://developers.facebook.com/apps
- Click on Create App
- “What do you want your app to do?”, select Other.
- Select Business type
- Give it any name and select your newly created Business Portfolio
- On the app page, look for WhatsApp product. Click setup and then enable it
Create a Meta App
Estimated Time: 2 minutes
Follow these simple steps to create your Meta app:
- Access the App Creation Page
- Open your web browser and navigate to Meta Developers Page.
- Ensure you are logged in with your Facebook account that has access to the Business features.
Business Portfolio
If you don't see your Business Portfolio, ensure that your Facebook account is linked to your business and that you have the necessary permissions.
-
Initiate App Creation
- Click on the Create App button. This is usually located at the top right of the page.
-
Define Your App’s Purpose
- You will be prompted with the question: “What do you want your app to do?” Select Other from the list of options.
-
Select an app Type
- Choose Business as the type of your app from the options.
-
Name Your App
- Enter a name for your app. Choose a name that is easy to identify and relevant to its function.
- Select the Business Portfolio to which this app will belong.
- Click Create app
Choose an Appropriate App Name
The app name should be relevant to its functionality to make it easier to manage if you have multiple apps.
- Add WhatsApp product to your app
- On your app’s dashboard, look for the WhatsApp card.
- Click on Setup next to WhatsApp, then follow the prompts to enable it.
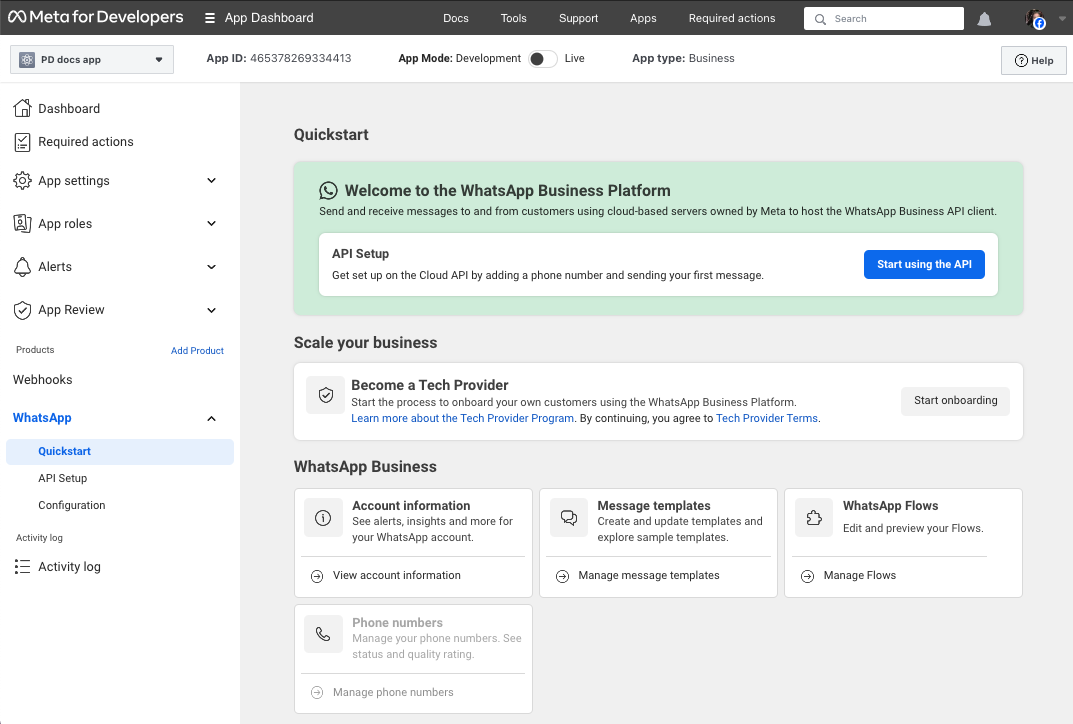
- When you see an image like below, you have completed the meta app creation. Congrats!

This guide should help you smoothly create a Meta app with WhatsApp integration. If you encounter any issues, refer to the Meta Developer Documentation for detailed guidance or contact us for help.